

Unlocking the illusion of depth on a two-dimensional plane is nothing short of alchemy—transforming flat lines into tangible, almost touchable forms. The magic lies not in the tools you wield, but in the principles you master. Whether you’re sketching on a napkin or a pristine sketchbook, the techniques to infuse your drawings with three-dimensionality are universal. Let’s embark on a journey through the tactile world of 3D drawing, where perspective, shading, and composition converge to breathe life into your art.
The Bedrock of Illusion: Understanding Perspective
Perspective is the architect of depth, the invisible hand that guides the viewer’s eye through your composition. At its core, it’s about manipulating lines to mimic how our eyes perceive the world. Start with the simplest form: the one-point perspective. Imagine standing at the end of a long, straight hallway. The walls, floor, and ceiling all converge at a single vanishing point on the horizon. This technique is your gateway to realism. Practice drawing boxes, roads, or even a humble bookshelf using this method. The key? Keep your vanishing point consistent—any deviation will shatter the illusion.
But what if your scene demands more complexity? Enter two-point perspective, where two vanishing points govern the composition. Picture a cityscape with towering buildings receding into the distance. Each building’s edges will angle toward one of the two points, creating a dynamic, almost cinematic depth. For the bold, three-point perspective introduces a third vanishing point, either above or below the horizon, perfect for dramatic angles like looking up at a skyscraper or down from a cliff. Master these perspectives, and you’ll command the viewer’s gaze with precision.
Shading: The Sculptor’s Chisel
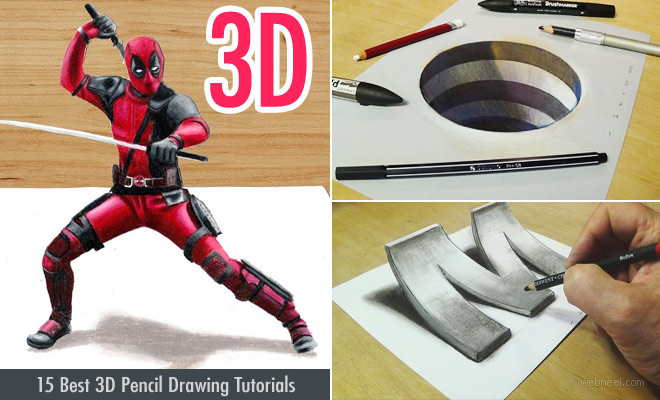
Shading is where flat shapes metamorphose into tangible forms. It’s not merely about adding darkness; it’s about orchestrating light. Begin with the basics: the light source. Decide where your imaginary sun or lamp is positioned, and let that dictate your shadows. The core shadows, those areas directly shielded from light, should be the darkest. Midtones, the transitional zones, soften the contrast, while highlights—those gleaming spots—define the edges of your subject. Use a blending stump or your finger to smudge graphite or charcoal, creating seamless gradients that mimic the softness of real surfaces.
For an extra layer of realism, employ cross-hatching. This technique involves layering parallel lines in varying densities to build up tone. The closer the lines, the darker the area appears. Combine this with stippling—tiny dots—to add texture to surfaces like wood grain or fabric. Don’t shy away from experimenting with different mediums: ink for sharp contrasts, pastels for velvety blends, or even digital brushes that simulate traditional textures. The interplay of light and shadow is your most potent tool for conjuring three-dimensionality.
Layering and Overlapping: The Art of Occlusion
Occlusion is the silent storyteller in your drawing, the principle that objects closer to the viewer obscure those farther away. It’s the reason a tree trunk hides part of a path behind it, or why your hand blocks the view of a book on a table. To harness this, start by sketching your foreground elements first. These should be the most detailed and prominent. As you move toward the background, reduce the clarity and size of objects. Use lighter lines and softer edges to imply distance. This technique, known as atmospheric perspective, also leverages the fact that distant objects appear lighter and less distinct due to the scattering of light in the air.
Overlapping isn’t just about hiding parts of objects—it’s about creating relationships between them. A person standing in front of a building doesn’t just cover part of the structure; they become the focal point, drawing the viewer’s eye. Play with the hierarchy of your elements. A small, detailed object in the foreground can command attention just as effectively as a large, muted one in the background. The key is to guide the viewer’s gaze through a deliberate arrangement of layers, each contributing to the narrative of depth.
Texture and Detail: The Devil in the Details
Texture is the sensory bridge between your drawing and reality. A smooth, metallic surface reflects light differently than a rough, woven fabric. To convey texture, observe how light interacts with different materials. For metallic objects, use sharp, clean lines and high-contrast highlights to mimic reflective surfaces. For organic textures like leaves or skin, employ a combination of stippling and fine cross-hatching to capture the subtle variations in tone. Even the most mundane objects gain depth when their textures are rendered with care.
Don’t overlook the power of detail in suggesting depth. A distant mountain range might be rendered with a few simple shapes, while a close-up of a leaf reveals intricate veins. This contrast in detail reinforces the viewer’s perception of distance. Additionally, consider the edges of your objects. Sharp, defined edges suggest proximity, while softer, blurred edges imply distance. This subtle distinction can elevate your drawing from flat to phenomenally three-dimensional.
Composition and Framing: The Director’s Cut
A well-composed drawing doesn’t just show objects—it tells a story. The placement of your subject within the frame can dramatically alter the perception of depth. The rule of thirds, a classic compositional tool, divides your canvas into a grid. Placing your focal point along these lines or at their intersections creates balance and guides the viewer’s eye. For a more dynamic composition, experiment with leading lines—paths, roads, or even the gaze of a character—that draw the viewer into the scene.
Framing is another subtle yet powerful technique. Use elements within your drawing to create a “window” into the scene. A window frame, a doorway, or even the branches of a tree can act as a natural border, enhancing the illusion of depth. Additionally, consider the angle of your view. A low-angle shot, looking up at a subject, can make it appear towering and imposing, while a high-angle shot, looking down, can create a sense of vulnerability or vastness. The way you frame your subject shapes the viewer’s emotional response and their perception of space.
Tools and Techniques: Elevating Your Craft
The tools you choose can either hinder or enhance your ability to create 3D illusions. Graphite pencils, with their range of hardness, are ideal for precise shading and detailing. Charcoal, with its rich, velvety texture, excels at bold contrasts and atmospheric effects. Ink pens, particularly fine liners, are perfect for crisp lines and cross-hatching. For digital artists, layering modes like “Multiply” for shadows and “Overlay” for highlights can simulate traditional techniques with ease.
Experiment with unconventional tools to add uniqueness to your work. A toothbrush can splatter ink for a textured, organic feel, while a credit card can create smooth, sweeping gradients. Even household items like sponges or crumpled paper can be used to stamp textures onto your drawing. The key is to remain adaptable and open to experimentation. The most stunning 3D drawings often emerge from a willingness to break conventions and explore new methods.
Practice and Patience: The Alchemy of Mastery
Mastering the art of 3D drawing is a journey, not a destination. It requires patience, persistence, and an insatiable curiosity. Start with simple exercises: draw a series of cubes using different perspectives, or practice shading a sphere until it looks like a tangible orb. Gradually, challenge yourself with more complex subjects—a still life of everyday objects, a bustling cityscape, or a portrait with lifelike depth. Study the work of artists who excel in 3D illusions, and deconstruct their techniques. How did they use light? What perspectives did they employ? Reverse-engineer their process to uncover the secrets behind their magic.
Remember, every stroke is a step toward mastery. Embrace the imperfections, for they are the fingerprints of your growth. The more you draw, the more intuitive these techniques will become. Soon, the illusion of depth will flow effortlessly from your hand, and your drawings will leap off the page, inviting viewers to step into a world where flat lines cease to exist.
The canvas is your stage, and depth is your most captivating performance. With each drawing, you’re not just creating art—you’re crafting an experience, a moment where the two-dimensional becomes a portal to another world. So pick up your tools, trust your instincts, and let the alchemy of 3D drawing transform your vision into reality.


Leave a Comment