

Pinholes in pottery glaze are those tiny, almost imperceptible craters that dot the surface of your carefully crafted ceramic piece, turning what should be a flawless finish into a landscape of microscopic craters. They’re the bane of potters everywhere, a silent saboteur of otherwise stunning work. But what causes these pesky imperfections, and more importantly, how can you banish them for good? Let’s dive into the science, the art, and the practical solutions behind glaze pinholes, transforming your pottery from flawed to fabulous.
Imagine spending hours perfecting a glaze recipe, only to pull your piece from the kiln and find it marred by tiny holes. It’s enough to make even the most seasoned potter groan in frustration. Pinholes aren’t just a cosmetic issue—they can weaken the glaze’s integrity, making it more susceptible to chipping or staining. But fear not, because understanding the root causes is the first step toward crafting glaze that’s as smooth as glass.
The Chemistry Behind Pinholes: A Delicate Dance of Ingredients
At the heart of every glaze pinhole lies a chemical imbalance. Glazes are complex mixtures of silica, fluxes, and colorants, each playing a crucial role in the final outcome. When these ingredients don’t harmonize, the glaze can’t mature properly, leading to the formation of pinholes. One of the primary culprits is the presence of organic matter or carbon in the glaze. During firing, these impurities burn out, leaving behind tiny voids that manifest as pinholes.
Another critical factor is the glaze’s viscosity. If the glaze is too fluid when it melts, it can’t trap gases effectively, causing them to escape and create pinholes. Conversely, if the glaze is too thick, it may not flow smoothly, trapping air bubbles that later burst, leaving behind craters. The key is finding the sweet spot where the glaze is fluid enough to self-level but viscous enough to hold its form.

The firing schedule also plays a pivotal role. Rapid heating or cooling can trap gases within the glaze, leading to pinholes as they escape. A well-controlled kiln schedule allows gases to escape gradually, ensuring a smooth, even finish. Additionally, the type of kiln atmosphere—whether oxidation, reduction, or neutral—can influence how gases interact with the glaze, further affecting the presence of pinholes.
Common Culprits: Identifying the Usual Suspects
Pinholes don’t appear out of thin air; they’re the result of specific issues in your glaze or firing process. One of the most common causes is the use of raw materials that contain organic impurities. Clay bodies, especially those with high organic content, can release gases during firing, creating pinholes in the glaze. To mitigate this, consider pre-washing your clay or using a more refined, organic-free clay body.
Another frequent offender is the glaze’s suspension properties. If the glaze slurry is too thin or lacks proper suspending agents, particles can settle unevenly, leading to inconsistencies in the glaze layer. This unevenness can trap air or gases, resulting in pinholes. Adding a small amount of bentonite or another suspending agent can help maintain a uniform consistency, ensuring a smoother application.
The application technique itself can also contribute to pinholes. Thick layers of glaze, applied too quickly or unevenly, can trap air bubbles that later burst, leaving behind pinholes. To avoid this, apply glaze in thin, even layers, allowing each coat to dry slightly before adding another. This method not only reduces the risk of pinholes but also enhances the glaze’s overall appearance.
Lastly, the choice of glaze ingredients can make or break your finish. Certain fluxes, like boron or lithium, can lower the glaze’s melting point but may also increase its tendency to form pinholes. Experimenting with different flux combinations or adjusting the glaze’s silica-to-alumina ratio can help you find a balance that minimizes pinholes while achieving the desired finish.
Prevention Strategies: Crafting a Pinhole-Free Glaze
Preventing pinholes starts long before the kiln is even fired. It begins with the careful selection and preparation of your materials. Using high-quality, refined clays and glazes can significantly reduce the risk of organic impurities. Additionally, sieving your glaze slurry through a fine mesh (such as 80 or 100 mesh) can remove any large particles or impurities that could contribute to pinholes.
Proper glaze mixing is another critical step. Ensure that your glaze ingredients are thoroughly blended and that the slurry has a consistent viscosity. A glaze that’s too thick or too thin can lead to application issues, increasing the likelihood of pinholes. Using a deflocculant, like sodium silicate or Darvan, can help achieve the ideal consistency, making the glaze easier to apply and less prone to defects.
When applying the glaze, technique matters. Dip, spray, or brush your glaze evenly, avoiding thick buildup in any one area. If using a brush, work in thin, overlapping strokes to prevent air bubbles from forming. For dipping, ensure the piece is fully submerged for the same amount of time to achieve a uniform layer. And always allow the glaze to dry completely between coats, as this reduces the risk of trapping air or moisture.
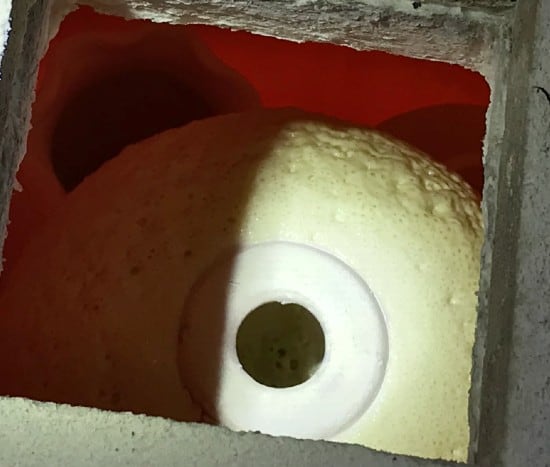
The firing process is where the magic happens—and where pinholes can be either prevented or created. A slow, controlled ramp-up in the kiln allows gases to escape gradually, reducing the risk of trapped bubbles. Similarly, a well-planned cooling schedule prevents thermal shock, which can cause the glaze to contract unevenly and form pinholes. Investing in a kiln with precise temperature control can make all the difference in achieving a flawless finish.
Troubleshooting Pinholes: Fixing the Unfixable
Even with the best preparation, pinholes can still appear. When they do, don’t despair—there are ways to salvage your piece. One approach is to apply a second layer of glaze, carefully sanding or smoothing the surface first to remove any loose particles. This can help fill in the pinholes and create a more uniform finish. However, be cautious not to over-apply, as this can lead to other issues like crawling or running.
Another option is to use a glaze repair technique, such as filling the pinholes with a compatible glaze or underglaze. This method works best for larger pinholes and requires a steady hand to blend the repair seamlessly. For smaller pinholes, a light sanding followed by a clear glaze or wax can help even out the surface, though this may not be suitable for functional pieces.
If the pinholes are widespread or severe, consider stripping the glaze entirely and starting fresh. This can be done using a glaze remover or by sandblasting the piece. While time-consuming, this approach ensures a clean slate and allows you to address the root cause of the pinholes before re-glazing.
Advanced Techniques: Elevating Your Glaze Game
For those looking to take their glaze work to the next level, advanced techniques can help minimize pinholes and achieve a truly professional finish. One such technique is the use of glaze additives, like silica fume or zircon, which can improve the glaze’s viscosity and reduce the formation of pinholes. These additives help the glaze flow more smoothly, trapping fewer gases and creating a denser, more uniform surface.
Another advanced method is the application of a glaze wash or engobe before the final glaze layer. This intermediate layer can help bridge the gap between the clay body and the glaze, reducing the risk of pinholes caused by incompatibility between the two. Additionally, using a glaze with a higher silica content can improve its self-healing properties, allowing minor imperfections to smooth out during firing.
Experimenting with different firing atmospheres can also yield surprising results. For example, a slightly reduced atmosphere can help burn out organic impurities more effectively, reducing the likelihood of pinholes. However, this requires careful monitoring to avoid over-reduction, which can lead to other defects like bloating or devitrification.
Embracing Imperfection: The Beauty of Flaws
While pinholes are often seen as a flaw, some potters embrace them as part of the creative process. The Japanese philosophy of wabi-sabi celebrates imperfection, finding beauty in the imperfect and the transient. Pinholes, in their own way, can add character and uniqueness to a piece, telling a story of the firing process and the materials used.
If you’re not sold on the idea of embracing pinholes, remember that even the most skilled potters encounter them. The key is to learn from each piece, adjusting your techniques and materials to minimize their occurrence. With patience and practice, you’ll find that creating pinhole-free glaze becomes second nature, allowing you to focus on the joy of pottery-making.
So the next time you pull a piece from the kiln and find it dotted with tiny craters, take a deep breath and remember: every pinhole is a lesson in disguise. With the right knowledge and techniques, you’ll be well on your way to crafting glazes that are as smooth as glass—and as flawless as your vision.


Leave a Comment