

Ever stood in your studio, ink glistening on your brayer, linocut block staring up at you like a blank canvas of untold potential—only to watch your chine-collé dreams crumble into a sticky, misaligned mess? You’re not alone. The art of chine-collé, that elegant marriage of delicate tissue paper and bold printmaking, is as much about precision as it is about passion. But what if I told you that pulling a perfect chine-collé print isn’t just about luck? What if every misaligned edge, every bubbled corner, every tear could have been avoided with the right sequence, the right pressure, the right *dance* between paper and plate? Let’s embark on a journey through the alchemy of chine-collé—where tissue becomes treasure, and every print tells a story of patience, technique, and a little bit of magic.
The Paper Paradox: Choosing the Right Tissue for Your Vision
Not all tissues are created equal. The chine-collé process thrives on contrast—delicate, translucent papers clinging to the inked plate like whispered secrets. But here’s the catch: the wrong paper can turn your masterpiece into a crumpled disaster. Start with lightweight, absorbent tissues like Kitakata or Awagami—these Japanese beauties are thin enough to conform to the plate’s contours yet strong enough to survive the press. Avoid anything too slick or glossy; those papers resist adhesion like a cat avoids water. And color? Think beyond white. A whisper of gold leaf embedded in tissue can transform your print into a gilded relic, while a muted indigo might evoke the depth of a twilight sky. The key is to match the paper’s weight to your plate’s depth—too heavy, and it won’t adhere; too light, and it’ll tear like tissue paper in a hurricane.
Pro tip: Test your paper first. Run a small strip through the press with no ink. If it emerges intact, you’re in business. If it shreds, it’s back to the drawing board—or the paper shop.
The Ink’s Secret Affair: Consistency is King
Ink isn’t just pigment suspended in oil; it’s the lifeblood of your print. Too thin, and it won’t grip the tissue. Too thick, and it’ll smother the delicate fibers. The sweet spot? A consistency that clings to your brayer like a loyal companion but releases effortlessly onto the plate. For oil-based inks, aim for a texture akin to soft butter—smooth, pliable, and just sticky enough to coax the tissue into submission. Water-based inks? They’re trickier, requiring a touch of retarder to slow their drying time and prevent the paper from sticking to the blanket instead of the plate.
But here’s where the real alchemy happens: ink coverage. A heavy hand will drown your tissue in a sea of color, obscuring its delicate texture. A light touch, however, allows the paper’s natural translucency to shine through, creating a luminous effect that’s nothing short of ethereal. Think of it as painting with light—every stroke of the brayer should whisper, not shout.

The Plate’s Silent Seduction: Preparing Your Block for Romance
Your linocut block is more than just a canvas—it’s a stage, and every groove, every gouge, is a character in the performance. Before you even think about tissue, your plate must be immaculate. Dust is the enemy. A single speck can create a void in your print, a ghostly absence where there should be color. Use a soft brush or a tack cloth to banish every particle, then give the block a final wipe with a barely damp cloth. Let it dry completely; moisture is the tissue’s worst nightmare.
Now, the adhesive. Traditionalists swear by rice paste—a concoction of rice flour and water, cooked to a silky consistency. It’s forgiving, reversible, and dries clear. But for those in a hurry, a thin layer of methyl cellulose or even a light spray of archival adhesive can work in a pinch. The goal? A surface that’s sticky enough to hold the tissue but not so glutinous that it warps the paper. Apply the adhesive sparingly, using a soft brush or a foam roller. Too much, and your tissue will ripple like a disturbed pond; too little, and it’ll peel away like a bad tattoo.
The Tissue Tango: Aligning Paper with Precision
Here’s where the magic—and the potential for disaster—lies. Laying tissue onto an inked plate is less about placement and more about choreography. Start by cutting your tissue to the exact dimensions of your plate, leaving a hair’s breadth of overlap on all sides. This isn’t just for aesthetics; it’s your insurance policy against misalignment. Now, the delicate dance begins. Gently place the tissue onto the plate, starting at one edge and easing it down like you’re tucking in a sleeping child. Use a soft brush or your fingers to smooth out any bubbles, working from the center outward. If a bubble persists, don’t panic—lift the tissue slightly, reposition, and try again. Patience is your ally here.
But what if your tissue is larger than your plate? Fear not. This is where the chine-collé sandwich comes into play. Layer your tissue over the plate, then place a sheet of newsprint or blotter paper on top. Run it through the press once to create a preliminary adhesion. Remove the newsprint, and voilà—your tissue is now securely (but temporarily) bonded to the plate. Now, you can add additional layers of tissue or even gold leaf, confident that everything will stay put during the final press.
The Press’s Unyielding Embrace: Pressure and Timing
The press is your partner in this dance, but it’s a partner with a mind of its own. Too much pressure, and your delicate tissue will be crushed into oblivion. Too little, and the adhesion will fail, leaving you with a sad, peeling mess. The sweet spot? Medium pressure—enough to coax the tissue into the plate’s grooves but not so much that it distorts the paper’s fibers. If you’re using a etching press, a single pass is often sufficient. For a relief press, you might need to run it through twice, allowing the tissue to settle into the ink’s embrace.
Timing is everything. Work quickly but deliberately. Once the tissue is on the plate, you have mere minutes before the ink starts to set. If you’re adding multiple layers, do it in stages, allowing each layer to adhere before proceeding. And don’t forget the blankets! A single, clean blanket is ideal—too many layers can create uneven pressure, leading to a print that’s more Picasso than perfection.
The Grand Finale: Peeling Back the Curtain
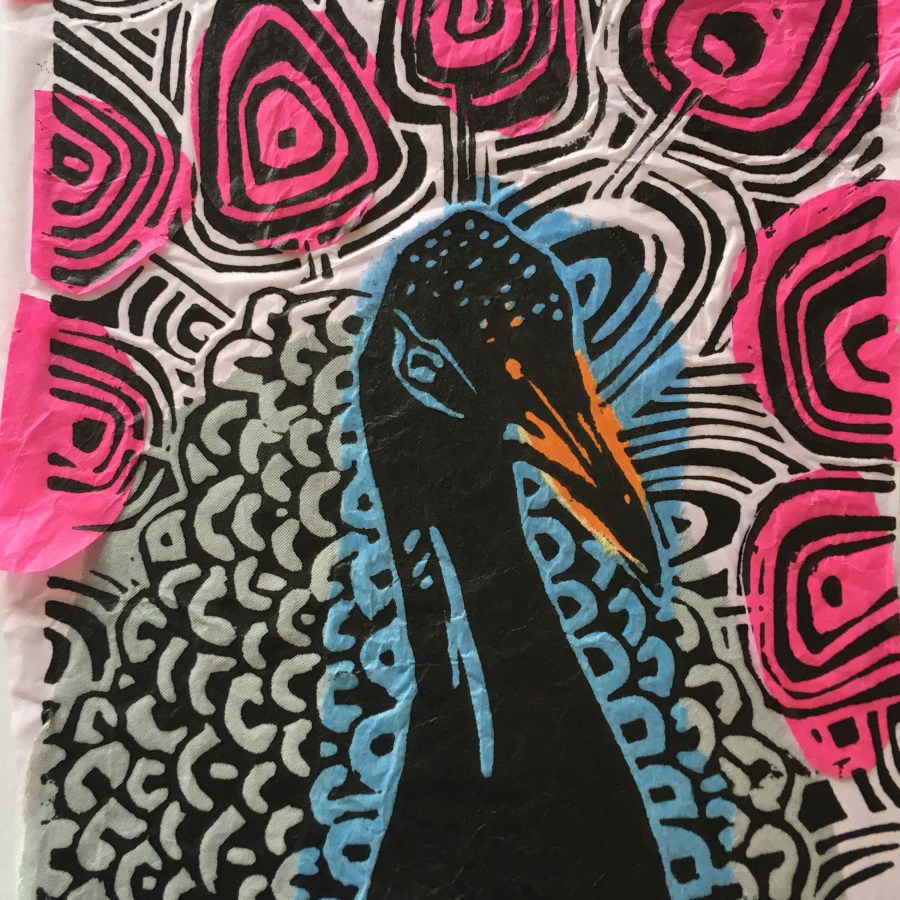
With bated breath, you lift the tissue from the plate. Will it hold? Will the colors sing? Will the details emerge like a phoenix from the ashes? The moment of truth is here. If all has gone well, your tissue will cling to the plate like a second skin, the ink seeping through its fibers to create a luminous, layered effect. If not—if the tissue tears or peels—don’t despair. This is where the true artist shines. Analyze what went wrong. Was the adhesive too weak? Was the pressure uneven? Was the tissue too heavy? Each failure is a lesson in disguise, a stepping stone toward mastery.
Once your print is dry, consider sealing it with a light coat of archival varnish to protect the delicate tissue. This isn’t just about preservation; it’s about enhancing the print’s depth, giving the colors a subtle sheen that makes them appear to glow from within.
The Aftermath: What to Do When Perfection Eludes You
Even the most seasoned printmakers face the occasional misstep. A bubble that refused to budge. A tear that appeared mid-press. A tissue that clung to the blanket instead of the plate. It happens to the best of us. But here’s the secret: embrace the imperfections. A slight misalignment can add a raw, organic quality to your print. A tear can become a deliberate design element, a scar that tells a story. The key is to learn from each failure, to refine your technique with every attempt. Keep a sketchbook of your experiments—note the papers, the inks, the pressures, the outcomes. Over time, you’ll develop an intuition for what works, a sixth sense that guides you toward that perfect print.
And remember: chine-collé isn’t just about technique. It’s about intention. Every layer of tissue, every brushstroke of ink, every press of the lever is a deliberate choice. It’s a dialogue between artist and material, a conversation that unfolds in real time. So the next time you stand in your studio, brayer in hand, ask yourself: What story do I want this print to tell? Then let the dance begin.


Leave a Comment