

Ever stared at a towering tree in your backyard and thought, “What if I could turn this into my own personal lumberyard?” Not in some grand, industrial sawmill kind of way—but with nothing more than a chainsaw, a few scraps of metal, and a dream? What if I told you that with just $200 and a weekend’s elbow grease, you could build a fully functional Alaskan chainsaw mill—your very own portal from log to lumber? No fancy workshops, no heavy machinery, no PhD in carpentry required. Just you, your trusty saw, and the raw, unfiltered joy of making something from scratch.
But here’s the catch: precision is everything. One misaligned cut, one wobbling guide, and suddenly your “rustic farmhouse table” starts looking more like abstract art. So, are you ready to embrace the challenge? To dance with danger, to flirt with frustration, and ultimately, to triumph? Let’s dive into the world of DIY lumber production—where every shaving tells a story, and every board is a testament to your ingenuity.
The Alaskan Chainsaw Mill: Your Ticket to Lumber Independence
Imagine this: a crisp autumn morning, the air thick with the scent of pine and possibility. You’ve just felled a beautiful cedar, its trunk thick and straight. Now, what do you do with it? Drag it to the local sawmill? Pay someone else to turn it into usable lumber? Not on your watch. The Alaskan chainsaw mill is your answer—a portable, low-cost, high-reward system that lets you mill your own timber on-site, with minimal setup and maximum control.
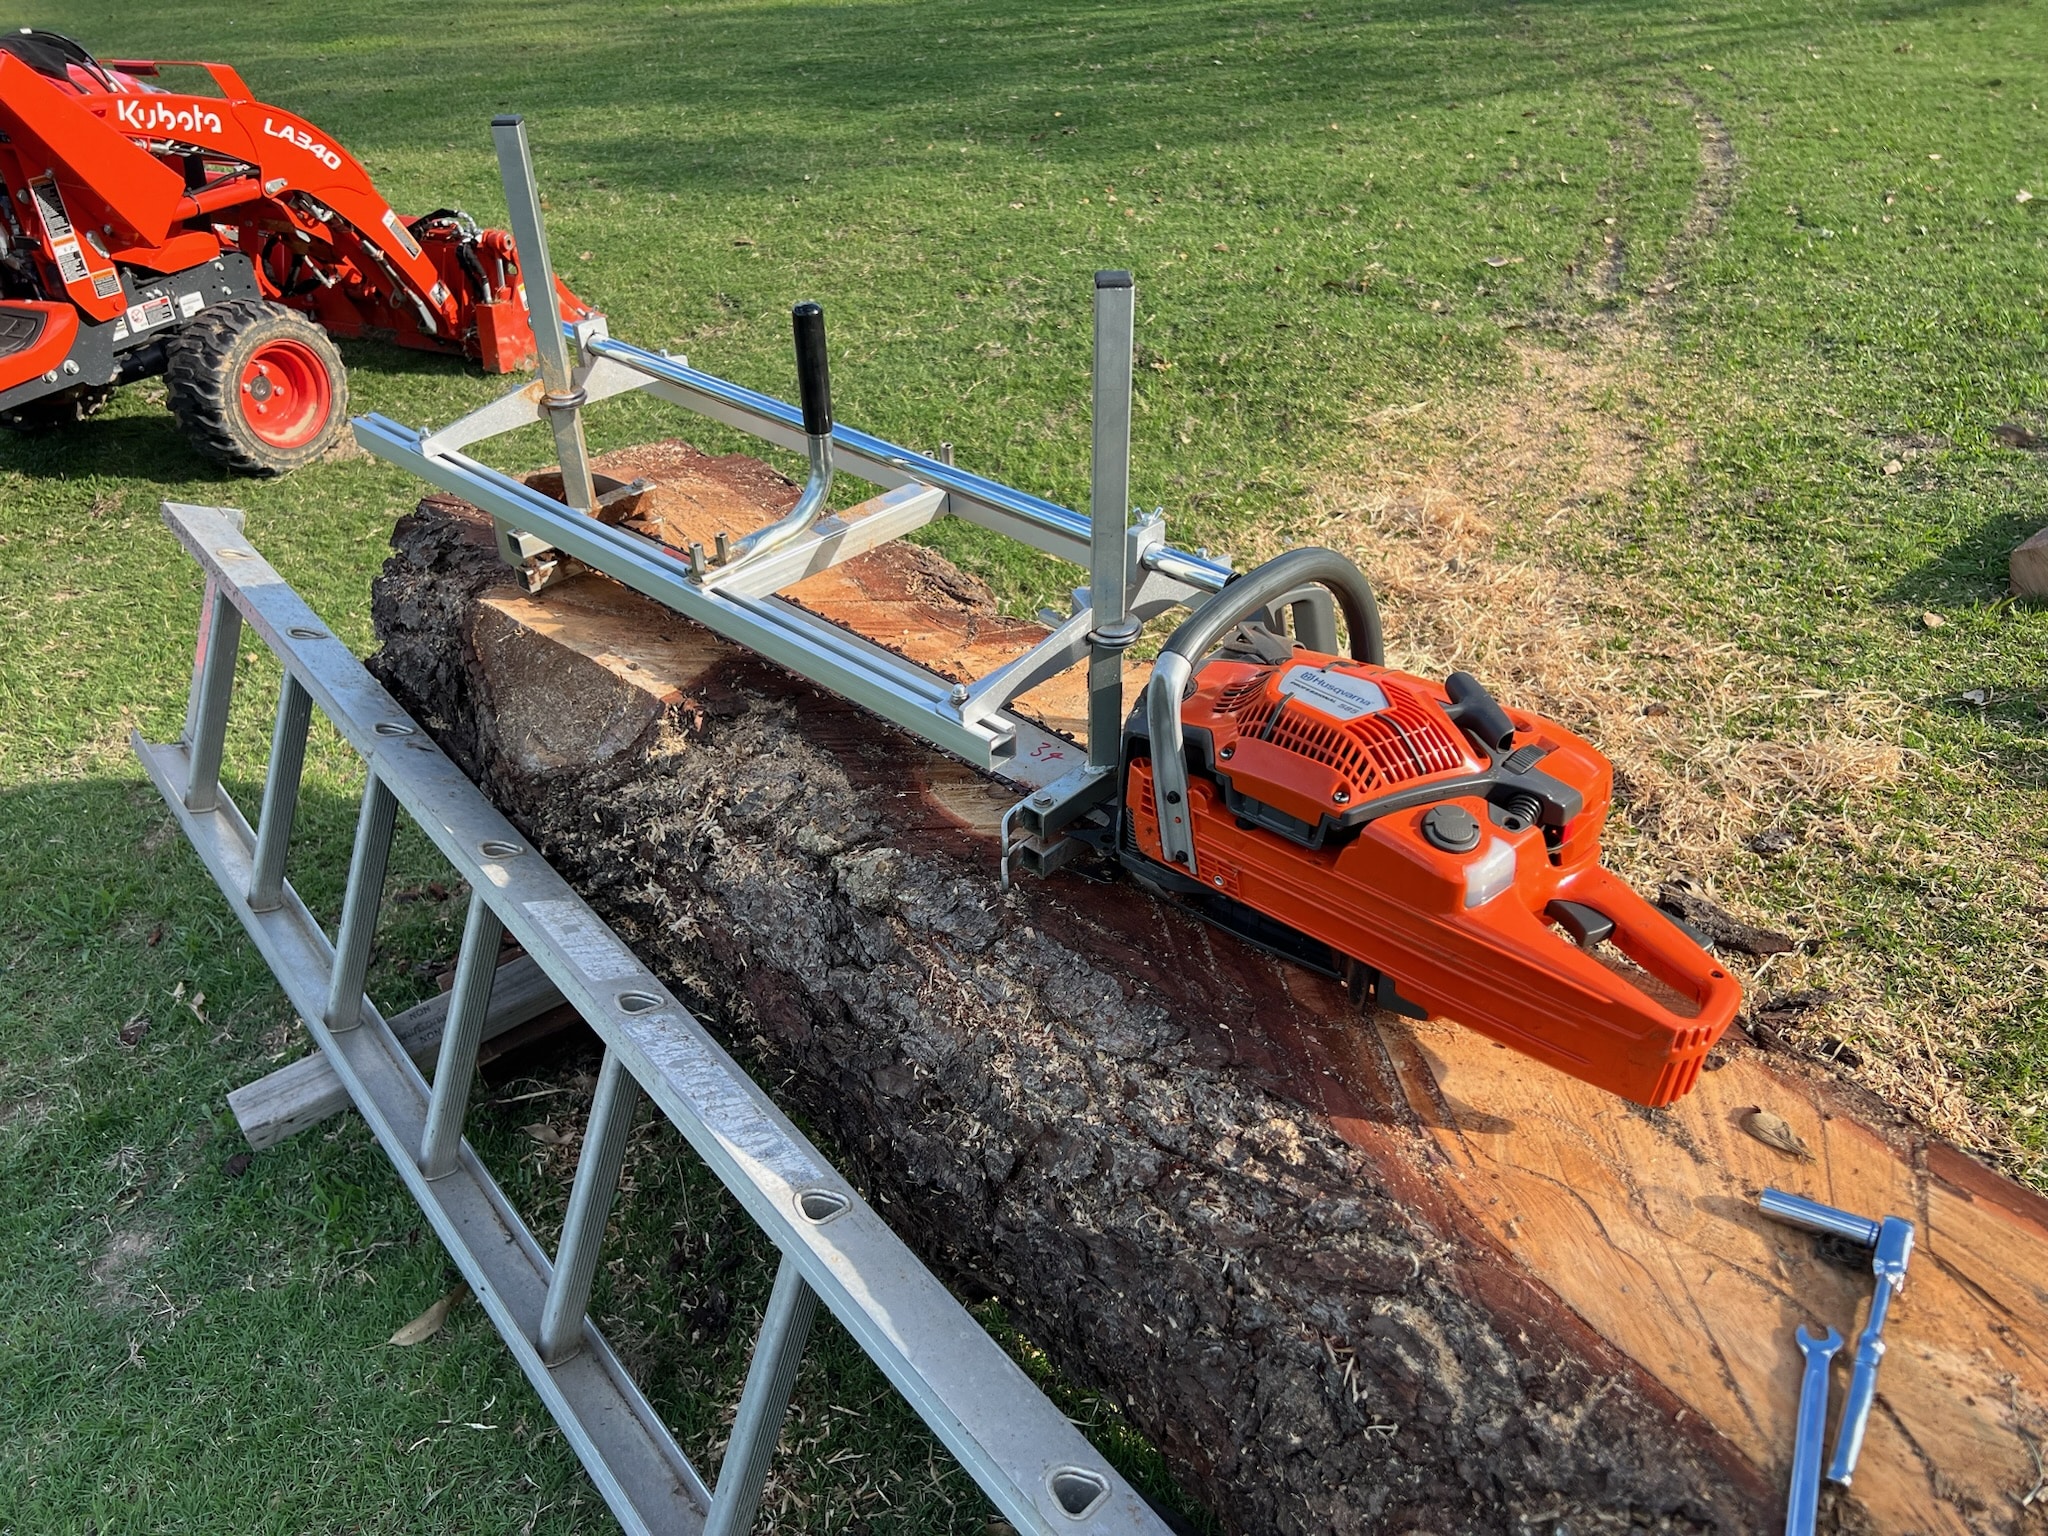
Originally designed by Alaskan homesteaders in the 1970s, this ingenious contraption is essentially a guided frame that clamps onto your chainsaw bar, turning it into a horizontal sawmill. No electricity. No noise complaints. Just raw power and raw wood. And the best part? You can build one for under $200 using off-the-shelf materials. That’s right—your lumberyard dreams are no longer a pipe dream. They’re a weekend project away.
But before you fire up that saw, let’s talk about the heart of the operation: the guide rails. These aren’t just any rails—they’re the backbone of your mill. Precision is non-negotiable. A warped or uneven rail means uneven cuts, which means wasted wood, wasted time, and wasted effort. So, choose your lumber wisely. Straight, dry, and knot-free boards are ideal. And for heaven’s sake, sand them smooth. You’re not building a treehouse here—you’re engineering a precision instrument.
Now, let’s talk hardware. You’ll need sturdy bolts, washers, and clamps—nothing flimsy, nothing cheap. This isn’t the time to scrimp. Think of it like assembling a high-performance race car: every bolt, every joint, every connection matters. Use galvanized or stainless steel to prevent rust, especially if you’re working outdoors. And for the love of all things holy, wear safety gear. Gloves, goggles, ear protection, and steel-toe boots aren’t optional—they’re mandatory. A chainsaw doesn’t care about your weekend plans. It cares about physics. And physics always wins.
Choosing the Right Chainsaw: Power Meets Precision
Not all chainsaws are created equal, and not all chainsaws are suited for milling. You need a saw with oomph—enough torque to chew through green wood without bogging down, enough bar length to handle your log diameter, and enough reliability to keep running when the going gets tough. A 50cc+ engine is your sweet spot, but don’t dismiss smaller saws entirely. If you’re working with smaller logs or dry, seasoned wood, a 40cc saw can still get the job done.
Bar length is another critical factor. A 20-inch bar is ideal for most DIY milling jobs. It gives you enough reach to cut wide slabs without sacrificing control. But if you’re tackling monster logs—think 30 inches in diameter—you might need to get creative. Some mill setups allow for bar extensions or even dual-bar configurations. Just remember: longer bars mean more weight, more vibration, and more strain on your arms. Balance is key.
And let’s not forget the chain. A sharp, full-chisel chain is your best friend. Skip the semi-chisel or low-profile options—they’re great for limbing and trimming, but they’ll struggle with milling. You want aggressive cutting, fast feed rates, and minimal kickback. Look for a chain with a low-kickback design, but don’t let that fool you into complacency. Kickback is still a real danger, especially when you’re pushing the saw through thick, wet wood.
Pro tip: Always carry a spare chain. Nothing kills momentum like a dull blade mid-cut. And if you’re working in cold weather, keep your chain in a warm pocket before installing it. Cold metal is brittle. Warm metal is flexible. It’s a small thing, but it makes a world of difference.
Finally, consider the ergonomics. Milling is a workout. You’ll be standing for hours, guiding a vibrating saw through dense wood, adjusting angles, and repositioning the log. A saw with an anti-vibration system and a comfortable grip will save your hands and your sanity. Test the saw before you buy it. Hold it. Feel its weight. Imagine using it for an hour. If it feels like a brick with a blade, keep looking.
Building Your Mill: A Step-by-Step Blueprint for Success
Now, the moment you’ve been waiting for: construction. Building an Alaskan chainsaw mill isn’t rocket science, but it does require patience, attention to detail, and a healthy dose of problem-solving. Let’s break it down into manageable steps.
Step 1: Gather Your Materials
You’ll need:
- Two 8-foot 2×6 or 2×8 boards (for the rails)
- One 4×4 post (for the log supports)
- Heavy-duty carriage bolts (½-inch by 5 inches)
- Washers and nuts (galvanized or stainless steel)
- L-brackets or angle iron (for reinforcement)
- U-bolts (to secure the saw to the mill)
- Wood screws and decking screws
- A straightedge or level
- Measuring tape and pencil
- Drill, impact driver, and wrenches
Step 2: Cut and Prepare the Rails
Your rails need to be perfectly straight. Any deviation will translate into uneven cuts. Use a table saw or a circular saw with a straightedge guide to rip your 2×6 or 2×8 boards to identical lengths. Eight feet is standard, but adjust based on your needs. Sand the edges smooth to prevent splinters and ensure a snug fit with your log supports.
Step 3: Assemble the Frame
Lay your two rails parallel to each other, about 24 inches apart. This spacing allows for most standard log diameters. Attach the 4×4 log supports at each end, perpendicular to the rails. Use heavy-duty wood screws or lag bolts to secure them. Reinforce the corners with L-brackets or angle iron for added stability. The goal is a rigid, unyielding frame that won’t flex under pressure.
Step 4: Mount the Chainsaw
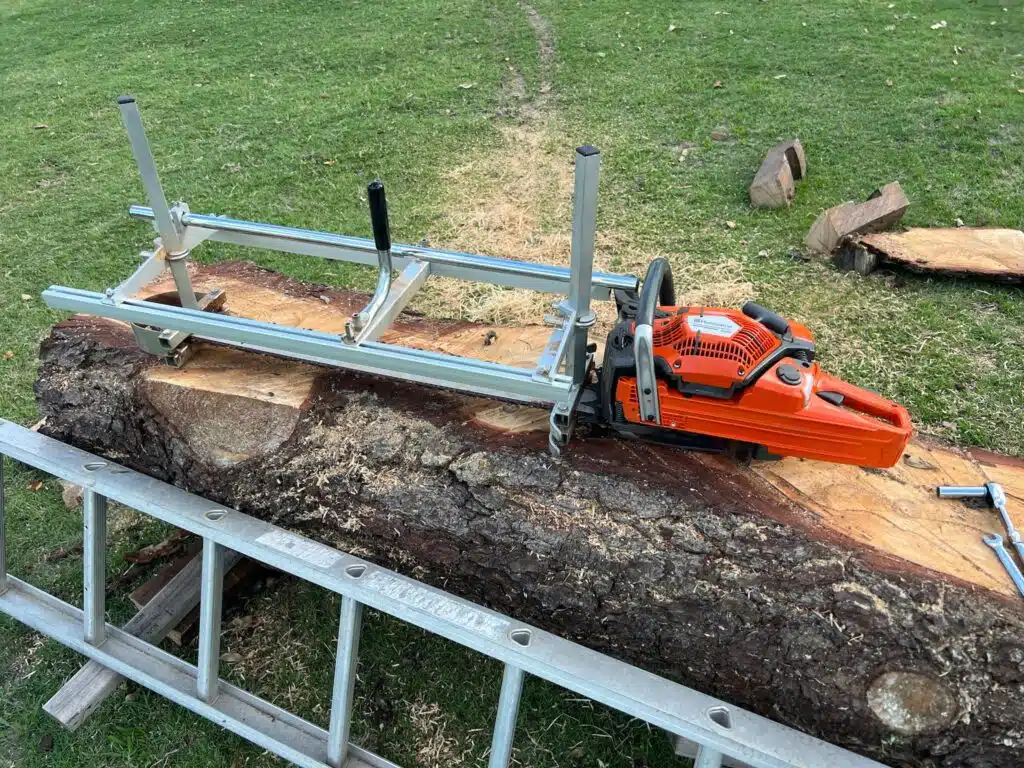
This is where the magic happens. You’ll need to attach the saw to the mill in a way that allows the bar to extend beyond the rail, cutting horizontally through the log. Most DIY setups use U-bolts or custom brackets to clamp the saw’s body to the rail. The key is alignment. The bar must be perfectly parallel to the rail, and the saw must be centered. Any tilt or offset will result in a skewed cut.
Pro tip: Use a straightedge or laser level to check alignment before tightening everything down. Once the saw is mounted, test the movement. The bar should glide smoothly along the rail without binding. If it catches or wobbles, adjust the mounting points until it’s silky smooth.
Step 5: Add the Log Supports
Your log needs to sit securely and level on the mill. Use additional 4×4 posts or sturdy sawhorses to support the log at both ends. The supports should be adjustable to accommodate different log lengths and diameters. Some builders use threaded rods or ratchet straps to fine-tune the height and angle of the log. The goal is a stable, level platform that won’t shift during cutting.
Step 6: Test and Calibrate
Before you dive into your first real log, run a test cut on a scrap piece of wood. This isn’t just about checking your setup—it’s about calibrating your expectations. How does the saw feel? How does the wood respond? Are there any vibrations or wobbles? Adjust as needed. Remember, your first cut is a learning experience, not a production run.
Mastering the Cut: Technique, Patience, and a Dash of Courage
You’ve built your mill. You’ve mounted your saw. You’ve prepped your log. Now comes the moment of truth: the first cut. This is where the rubber meets the road. This is where you either prove your mettle or learn a humbling lesson in humility.
Start with a dry, straight log. Green wood is heavier, harder to move, and prone to pinching the bar. It’s also more likely to gum up your chain. If you’re working with fresh timber, let it dry for a few weeks first. Patience now saves frustration later.
Position the log on the mill, ensuring it’s centered and level. Use wedges or blocks to shim it if necessary. The log should sit snugly against the rails, with no gaps or wobbles. Any movement during the cut will result in a crooked slab. And trust me, you do not want to explain to your spouse why your “rustic dining table” looks like it was carved by a drunk woodcarver.
Now, fire up the saw. Let it reach full throttle before you make contact with the wood. A slow start increases the risk of kickback and uneven cuts. Position the bar at the edge of the log, then gently lower it into the wood. Let the saw do the work. Don’t force it. Don’t rush it. Think of it like a dance—smooth, controlled, and deliberate.
As you cut, keep an eye on the bar’s alignment. If it starts to drift, stop immediately. Adjust the log or the mill before continuing. And for the love of all things sacred, never remove the saw from the wood while the chain is running. That’s a one-way ticket to kickback city. Always let the saw come to a complete stop before repositioning.
Once you’ve made your first pass, flip the log and repeat. Consistency is key. Each slab should be identical in thickness. Use a measuring tape or a marked guide on the rail to ensure uniformity. And if you’re aiming for furniture-grade lumber, sanding and planing will be your next steps. But that’s a story for another day.
Pro tip: Keep a notebook handy. Jot down your settings, your adjustments, your successes, and your failures. Over time, you’ll develop a system that works for you. And when your friends ask how you got so good at milling, you can smile and say, “I kept a log.”
So there you have it—your complete guide to building and operating an Alaskan chainsaw mill for under $200. From log to lumber, from raw timber to refined planks, you’ve now got the power to transform your backyard into a self-sustaining workshop. No permits. No permits. No waiting in line at the sawmill. Just you, your saw, and the open sky.
But here’s the real magic: this isn’t just about saving money. It’s about reclaiming a skill that’s been lost to the march of industrialization. It’s about standing in your workshop, running your hands over a board you milled yourself, and knowing that every grain, every knot, every imperfection tells a story. It’s about the quiet pride of knowing you built something from nothing.
So go ahead. Fire up that saw. Let the chips fly. And when you’re done, when you’re standing in a pile of your own lumber, take a moment to appreciate the journey. Because the best things in life aren’t just made—they’re earned. And you’ve just earned yours.


Leave a Comment