

There’s something almost magical about a chisel that glides through wood like a whisper through silk. You press it against the edge of a board, and instead of a ragged tear, you get a shaving so fine it curls into a translucent ribbon. That’s the allure of a razor-sharp chisel—it doesn’t just cut; it *sings*. Yet, for all its elegance, the process of sharpening one without a jig can feel like trying to tune a violin by ear in a windstorm. The fear of ruining an edge, the frustration of uneven bevels, the nagging doubt that your technique might be flawed—it’s enough to make even seasoned woodworkers hesitate. But here’s the secret: the path to hair-popping sharpness isn’t about precision tools or expensive setups. It’s about understanding the dance between steel and stone, and learning to trust your hands as much as your eyes.
The first time you witness a chisel transform from a dull, uncooperative hunk of metal into a gleaming, whisper-sharp tool, it’s like watching a caterpillar become a butterfly. The difference is so stark, so immediate, that it borders on alchemy. Yet the process itself is deceptively simple. It’s not about brute force or complicated machinery. It’s about rhythm, consistency, and a willingness to embrace the meditative repetition of the grind. So, let’s strip away the mystique and dive into the art of sharpening a chisel to a level that will leave you—and anyone watching—breathless.
The Anatomy of a Razor’s Edge: Understanding What You’re Working With
A chisel’s edge is more than just a line where two beveled surfaces meet. It’s a carefully engineered apex, a microcosm of geometry where millimeters matter. The bevel isn’t just a flat plane; it’s a controlled slope, typically between 20 and 30 degrees, designed to balance durability and cutting efficiency. Too steep, and the edge becomes brittle, prone to chipping under pressure. Too shallow, and it dulls in an instant, unable to resist the wood’s resistance. The secret lies in the *micro-bevel*—a secondary, narrower bevel (often 5 degrees or less) that refines the primary edge into something so fine it can split a human hair.
But here’s where the fascination deepens: the steel itself is a living thing. High-carbon steels, like those found in Japanese chisels or premium Western blades, develop a patina over time, a thin layer of oxidized steel that can either protect or hinder the sharpening process. The grain structure of the metal, invisible to the naked eye, dictates how the edge will respond to abrasion. A coarse grind on a soft steel might leave a ragged edge, while an overly fine polish on hard steel could create a brittle, fragile apex. Understanding these nuances isn’t just technical—it’s the difference between a tool that feels like an extension of your body and one that fights you every step of the way.
The Stone’s Secret: Choosing the Right Whetstone for the Job
Not all sharpening stones are created equal, and the wrong choice can turn a simple task into a Sisyphean ordeal. Coarse stones (around 400-800 grit) are the workhorses, erasing nicks and establishing the primary bevel. Medium stones (1000-3000 grit) refine the edge, smoothing out the scratches left by coarser grits. Fine stones (4000-8000 grit) and polishing stones (above 8000 grit) are where the magic happens, transforming a functional edge into something that could shave your arm hair. But here’s the kicker: the best stone is the one you’ll actually use. A 30,000-grit ceramic stone might sound divine, but if it takes 20 minutes to remove a single burr, you’ll abandon it faster than a cat abandons a bath.
Natural stones, like Arkansas or Belgian coticule, offer a tactile feedback that synthetic stones can’t match. They have a *feel*—a slight give, a resistance—that forces you to pay attention. Synthetic stones, on the other hand, are consistent, predictable, and often more forgiving for beginners. But the real game-changer? The *slurry*. That murky, grayish paste of stone particles and water that forms as you sharpen isn’t just a byproduct—it’s an abrasive in its own right. A well-maintained slurry can cut faster than the stone itself, turning a 1000-grit stone into something closer to 2000 grit. The key is to keep it wet but not soupy, and to refresh it regularly by tapping the stone against the side of your water container.

The Dance of Angles: Mastering Bevel Control Without a Jig
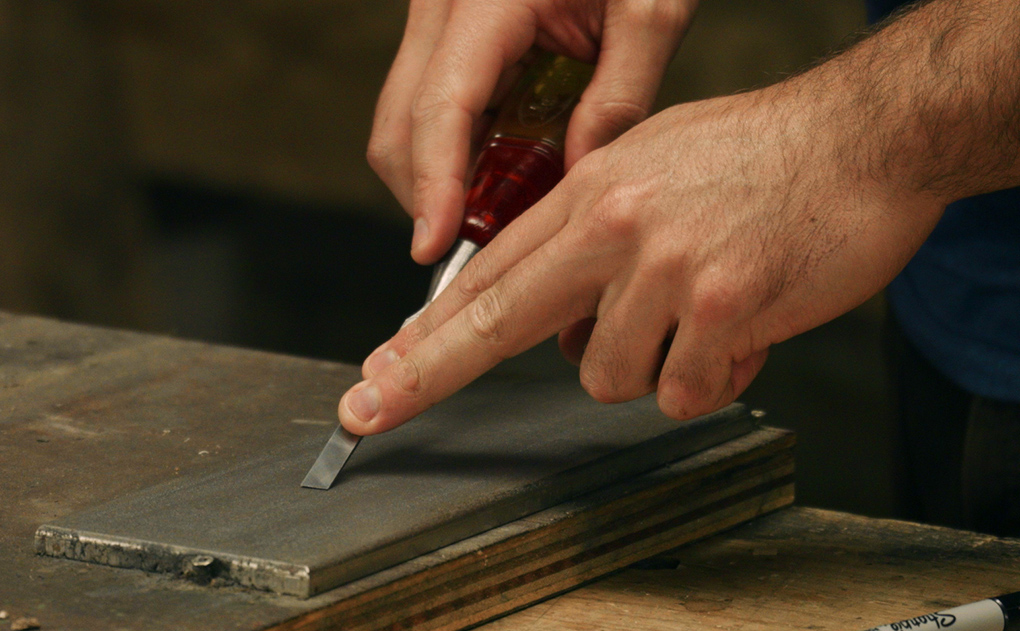
Jigs exist for a reason—they eliminate the guesswork of maintaining a consistent angle. But they also divorce you from the process, turning sharpening into a mechanical task rather than an intimate dialogue between hand and tool. Without a jig, you’re forced to *feel* the angle, to develop a kinesthetic memory that becomes second nature. Start by marking the bevel with a permanent marker or a pencil. As you sharpen, the lines will disappear first where the stone makes contact. That’s your visual cue—adjust your angle until the lines vanish evenly across the entire bevel.
The next step is to *listen*. A properly sharpened chisel should emit a high-pitched *screech* as the stone passes over the edge, a sound that’s as satisfying as it is functional. A dull *thud* or a scraping noise means you’re not maintaining the angle. Your grip matters too. Hold the chisel with a relaxed but firm grip, using your index finger to guide the bevel against the stone. Let your wrist act as a pivot, allowing the chisel to rock slightly as you move it across the stone. This motion ensures even wear and prevents the edge from developing a hollow grind.
But here’s where the deeper lesson reveals itself: sharpening without a jig isn’t just about technique—it’s about *presence*. The moment you stop thinking about the angle and start feeling the stone’s feedback, you’ve crossed into mastery. The chisel becomes an extension of your intent, and the edge you create is a direct reflection of your focus. It’s why some woodworkers swear by freehand sharpening; it’s not just about the tool’s sharpness, but the sharpeners’ connection to the craft.
The Burr: The Silent Witness to Your Progress
No discussion of sharpening is complete without addressing the burr—the thin, curled ribbon of metal that forms on the opposite side of the edge as you sharpen. It’s the bane of beginners and the badge of progress for the experienced. The burr is your confirmation that you’ve removed enough material to create a new edge. Ignore it, and you’ll be sharpening the same spot forever. Chase it, and you’ll round the edge, turning a sharp apex into a dull, rounded one.
To detect the burr, run your thumb *lightly* along the un-beveled side of the chisel. You’re not pressing hard—just enough to feel the raised metal. If you feel a slight catch, you’ve got a burr. Flip the chisel and repeat the process on the beveled side. The goal is to remove the burr entirely, but not by aggressively grinding it away. Instead, alternate sides, spending just a few strokes on each, until the burr vanishes. This back-and-forth ensures you’re not over-grinding one side, which can create an uneven edge.
The burr is more than just a byproduct—it’s a teacher. It forces you to slow down, to pay attention to the subtleties of the process. In a world where speed often trumps precision, the burr is a reminder that craftsmanship is a dialogue, not a monologue. It demands patience, and in return, it gifts you an edge that’s so fine it defies belief.
The Final Polish: Where Steel Meets Perfection
Once the burr is gone, the real refinement begins. This is where the chisel transitions from *sharp* to *hair-popping sharp*. The difference lies in the polish. A finely polished edge doesn’t just cut—it *slices*. The scratches left by the medium stone are still visible under magnification, but they’re so fine they don’t impede the cutting action. To achieve this, move to your finest stone or strop. If you’re using a stone, switch to a lighter pressure, almost as if you’re buffing the edge rather than grinding it. The goal isn’t to remove material but to refine the existing apex into something smoother than glass.
Stropping is the ultimate test of a truly sharp edge. A leather strop charged with chromium oxide or diamond paste can take an edge from excellent to extraordinary. The technique is simple: pull the chisel backward across the strop, maintaining the same angle you used on the stone. The leather’s slight give polishes the edge, removing the last microscopic imperfections. Do this for just a few passes, then test the edge on your thumbnail. A properly stropped chisel will *bite* into the nail, leaving a faint mark. If it just slides, it’s not sharp enough.
But here’s the philosophical twist: the pursuit of the perfect edge is never-ending. Even the most seasoned sharpeners will tell you that a chisel’s sharpness is fleeting. Use it, and it dulls. Re-sharpen, and it’s sharp again. The cycle is eternal, and that’s the beauty of it. Each sharpening session is a meditation, a chance to reconnect with the fundamentals of the craft. The chisel becomes more than a tool—it’s a mirror, reflecting your skill, your patience, and your commitment to the art.
The Ritual of the Razor’s Edge
Sharpening a chisel without a jig isn’t just a technical exercise; it’s a ritual. It’s the moment where the chaos of the workshop settles into rhythm, where the screech of the stone and the scent of water and metal become a symphony. It’s where you confront your impatience, your frustration, and your doubts—and emerge with a tool that’s better for it.
So the next time you pick up a chisel, don’t rush the sharpening process. Don’t treat it as a chore to be endured. Instead, approach it as an opportunity to refine not just the tool, but yourself. Feel the weight of the chisel in your hand. Listen to the stone’s feedback. Watch as the burr forms and vanishes, a tangible sign of your progress. And when you finally test the edge, and it glides through wood like a hot knife through butter, you’ll understand why this simple act has captivated woodworkers for centuries.
The path to hair-popping sharpness isn’t paved with expensive tools or shortcuts. It’s paved with patience, with attention to detail, and with a willingness to embrace the meditative repetition of the grind. And when you finally achieve that edge, you’ll know—this is what it means to work with your hands, to create something that’s not just functional, but *alive*.


Leave a Comment