

In the high-stakes world of live performance, where milliseconds can make or break a show, precision isn’t just a goal—it’s a necessity. Whether you’re coordinating a thunderous drum fill, triggering a subtle ambient effect, or cueing a complex sequence of lighting and sound, the difference between flawless execution and chaos often hinges on your ability to run a sound cue with 0.1-second precision every single time. This isn’t about luck or instinct; it’s about meticulous preparation, the right tools, and an intimate understanding of the systems at play. Let’s dive into the art and science of achieving this level of accuracy, exploring the techniques, technologies, and mindset that separate the amateurs from the professionals.
The Anatomy of a Sound Cue: Understanding the Components
A sound cue isn’t just a button press—it’s a symphony of interconnected elements working in unison. At its core, a sound cue consists of three critical components: the trigger, the processing chain, and the output. The trigger could be a MIDI note from a controller, a timecode event from a DAW, or even a manual switch. The processing chain involves everything from EQ and compression to spatial effects like reverb and delay. Finally, the output is where the magic happens—your speakers, headphones, or even a broadcast stream. Each of these components introduces potential latency, and even the smallest delay can compound into a noticeable lag. Recognizing where these delays originate is the first step toward eliminating them.
Consider the journey of a single audio sample. It starts as a digital signal in your DAW, travels through your audio interface, gets processed by plugins, and finally reaches your speakers. Each of these steps can introduce latency, measured in milliseconds. For instance, a typical audio interface might add 2-10ms of latency, while a complex plugin chain could add another 5-20ms. Even the speed of sound itself plays a role—sound travels at approximately 343 meters per second, meaning a delay of just 0.1 seconds equates to a distance of about 34 meters. In a large venue, this can mean the difference between a cue hitting the audience at the perfect moment or arriving slightly late, disrupting the immersive experience.
Choosing the Right Tools: Hardware and Software for Precision
Not all tools are created equal when it comes to precision. The hardware and software you choose can dramatically impact your ability to execute sound cues with 0.1-second accuracy. On the hardware side, low-latency audio interfaces are non-negotiable. Look for models with ASIO or Core Audio drivers, which are designed to minimize processing delays. Interfaces like the RME Fireface or the Universal Audio Apollo series are renowned for their sub-millisecond latency, making them ideal for live sound applications. Additionally, consider using dedicated cue mixers or personal monitor systems, which allow performers to hear their cues in real-time without relying on the main PA system’s latency.
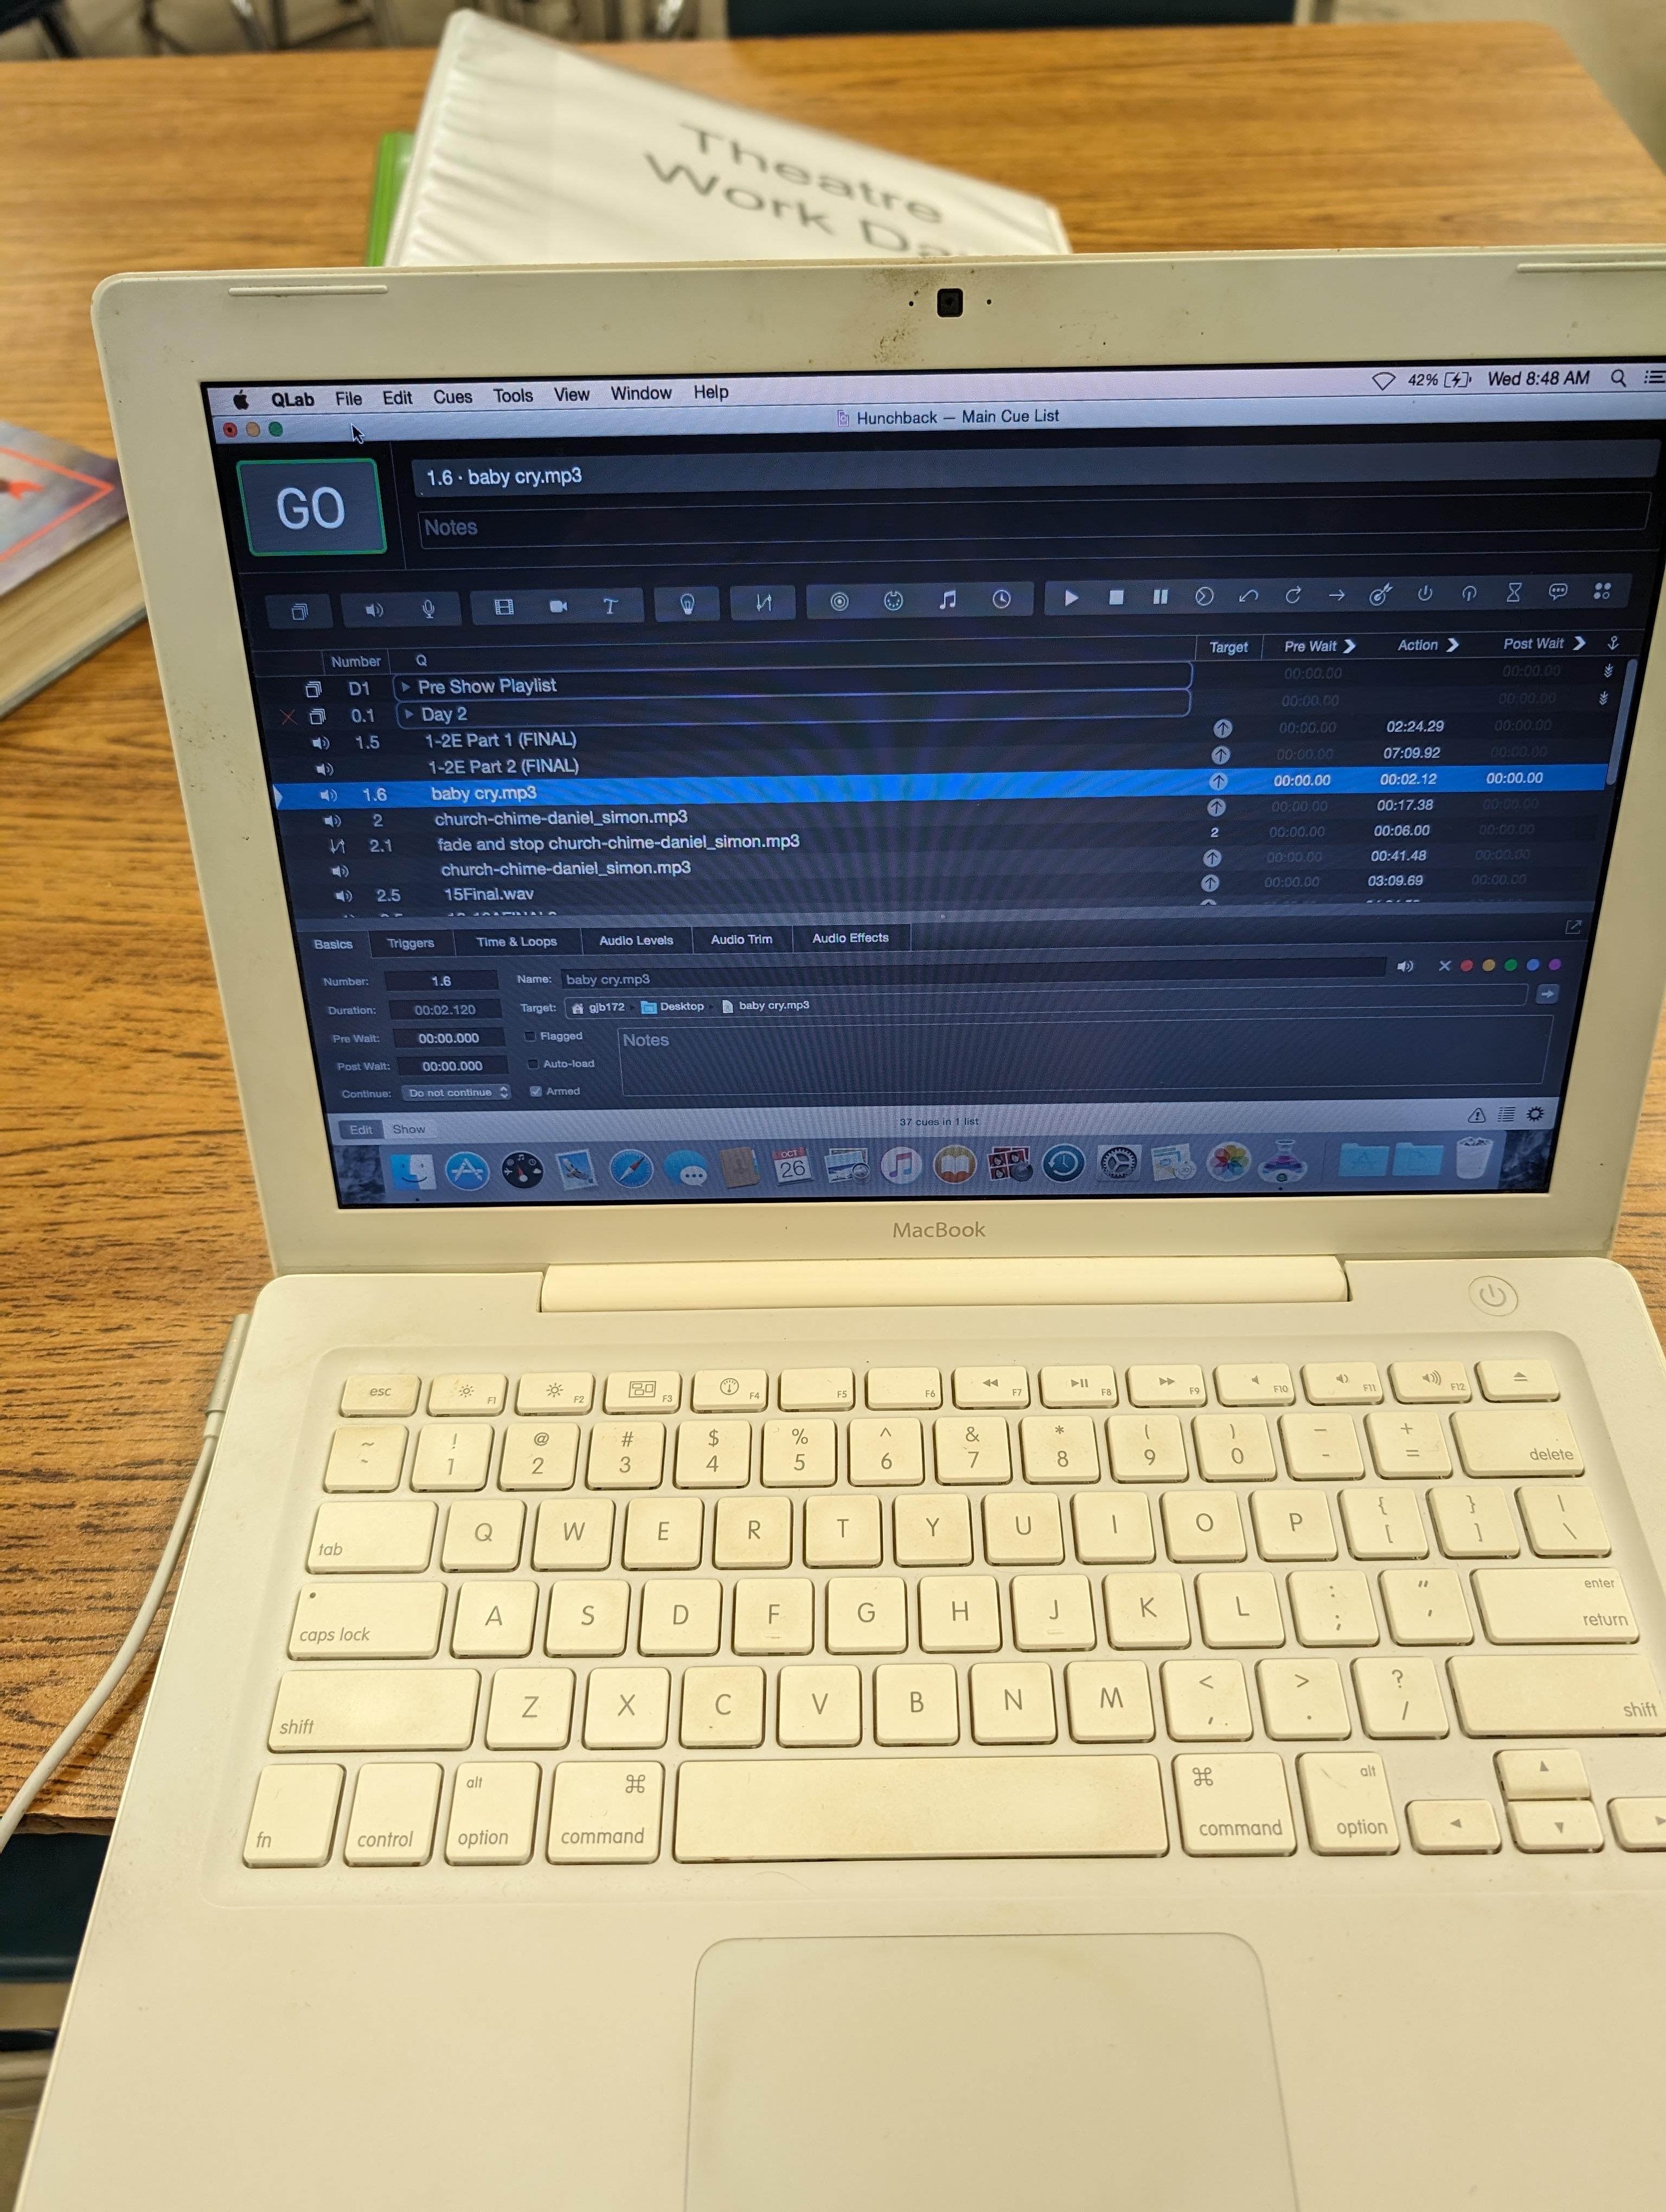
Software choices are equally critical. Digital Audio Workstations (DAWs) like Ableton Live, Bitwig Studio, or QLab are favored for their robust MIDI and timecode capabilities. These platforms allow you to program cues with frame-accurate precision, sync them to video or lighting systems, and even automate complex sequences. For instance, Ableton Live’s Session View is perfect for triggering clips on the fly, while QLab excels in theatrical and live event settings with its built-in timecode and OSC support. Plugins also play a role—opt for low-latency processors and avoid CPU-intensive effects during live performances. Tools like Waves’ low-latency plugins or iZotope’s Nectar Elements can help maintain speed without sacrificing quality.
Mastering Latency: Techniques to Shrink the Gap
Latency is the silent saboteur of precision sound cues. Even a 10ms delay can feel jarring in a live setting, where performers and audiences expect instantaneous responses. To combat this, start by measuring your system’s baseline latency. Most DAWs and audio interfaces provide a latency calculator, which can help you identify where delays are occurring. Once you’ve pinpointed the bottlenecks, it’s time to optimize. One effective strategy is to use direct monitoring, which bypasses the computer’s audio interface entirely, sending the input signal straight to the output. This eliminates the round-trip latency of processing through plugins and ensures performers hear their cues in real-time.
Another technique is to pre-render complex effects. If you’re using reverb or delay in your cue chain, consider rendering these effects to audio files beforehand. This way, the only processing happening live is the playback of the pre-rendered audio, which significantly reduces latency. Additionally, adjust your buffer sizes carefully. Smaller buffer sizes reduce latency but increase CPU load, while larger buffers do the opposite. Finding the right balance is key—start with a buffer size of 128 samples (about 2.9ms at 44.1kHz) and adjust based on your system’s performance. For ultra-low latency, some professionals use dedicated DSP hardware, like the SSL MX-Delta or Avid S6, which offload processing from the main CPU, allowing for near-zero latency monitoring.
Synchronization Strategies: Aligning Sound with Other Elements
A sound cue rarely operates in isolation. In most productions, it’s part of a larger ecosystem that includes lighting, video, and stage effects. Synchronizing these elements with sub-second precision requires a combination of timecode and networked control systems. MIDI Time Code (MTC) and SMPTE are industry standards for syncing audio to other media, but they can introduce latency if not configured correctly. To minimize delays, use a dedicated timecode generator, such as the Rosendahl Nanosyncs or the Aaton Cantar, which provide stable, jitter-free clock signals. Additionally, leverage networked protocols like OSC (Open Sound Control) or Art-Net for lighting control, as they offer faster communication than traditional MIDI.
In theatrical productions, the challenge is even greater. Here, sound cues must align with actors’ movements, set changes, and lighting shifts, all while maintaining the illusion of spontaneity. This is where cue sheets and pre-programmed sequences become invaluable. Tools like QLab or Isadora allow you to create intricate cue lists that trigger multiple systems simultaneously. For example, a single cue might fade out the music, trigger a door slam sound effect, and dim the lights—all within a 0.1-second window. To ensure accuracy, rehearse with the full production team, using a stopwatch to measure the time between cues. Over time, you’ll develop an intuitive sense of timing, allowing you to adjust cues on the fly without sacrificing precision.
Testing and Refining: The Path to Flawless Execution
Precision isn’t achieved through guesswork—it’s the result of rigorous testing and refinement. Start by creating a test cue that triggers a simple sound, like a click or a tone, and measure the delay between the trigger and the output. Use a high-speed camera or an oscilloscope to visualize the delay, and adjust your system accordingly. Once you’ve dialed in your setup, move on to more complex cues. Test each one under different conditions—with and without performers, in different venues, and with varying system loads. Keep detailed notes on what works and what doesn’t, and don’t be afraid to iterate. Even the smallest tweak, like changing a buffer size or re-routing an audio signal, can make a world of difference.
Another critical aspect of testing is stress-testing your system. Simulate real-world conditions by running multiple cues in rapid succession, or by introducing unexpected variables, like a sudden spike in CPU usage. This will help you identify potential failure points before they become problems during a live performance. Additionally, always have a backup plan. Whether it’s a secondary audio interface, a printed cue sheet, or a pre-recorded backup track, redundancy is your safety net. Remember, the goal isn’t just to execute a perfect cue—it’s to do so consistently, no matter what challenges arise.

Mindset and Workflow: The Human Factor in Precision
While technology provides the tools, it’s the human element that brings precision to life. Developing a workflow that prioritizes accuracy starts with discipline. Before every rehearsal or performance, take the time to review your cue list, test your system, and mentally walk through each step. Familiarity breeds confidence, and confidence is key to executing cues flawlessly under pressure. Additionally, cultivate a culture of communication with your team. Whether you’re working with a stage manager, a lighting designer, or a performer, ensure everyone understands the timing requirements and their role in the process. A well-coordinated team is far more likely to hit those 0.1-second marks than a group working in isolation.
It’s also important to manage expectations. Not every cue will be perfect, and that’s okay. What matters is how you respond when things go wrong. Stay calm, troubleshoot methodically, and communicate clearly. Audiences are forgiving of minor hiccups, but they notice when a team is unprepared. Finally, never stop learning. The world of live sound is constantly evolving, with new tools and techniques emerging all the time. Stay curious, experiment with new methods, and always be on the lookout for ways to improve. Precision isn’t a destination—it’s a journey, and every performance is an opportunity to refine your craft.
In the end, running a sound cue with 0.1-second precision is about more than just technical skill—it’s about creating an experience that feels seamless and immersive. It’s about ensuring that every beat, every note, and every effect lands exactly where it should, every single time. With the right tools, techniques, and mindset, you can transform what was once a daunting challenge into second nature. So go ahead—press play, hit the cue, and let the magic unfold.


Leave a Comment