

Transforming a humble IKEA cabinet into a high-end built-in masterpiece is no longer a pipe dream—it’s a savvy, budget-friendly reality. With a few strategic tweaks, some elbow grease, and a dash of creativity, you can achieve the luxe, custom-built aesthetic of a $5,000 designer installation without the hefty price tag. Whether you’re a seasoned DIYer or a first-time hacksaw wielding novice, these ingenious IKEA hacks will elevate your space from flat-pack mediocrity to architectural marvel. Let’s dive into the transformative world of IKEA built-ins, where every screw and stroke of paint tells a story of ingenuity and thrift.
The Art of Illusion: How to Fake a Custom Built-In with IKEA
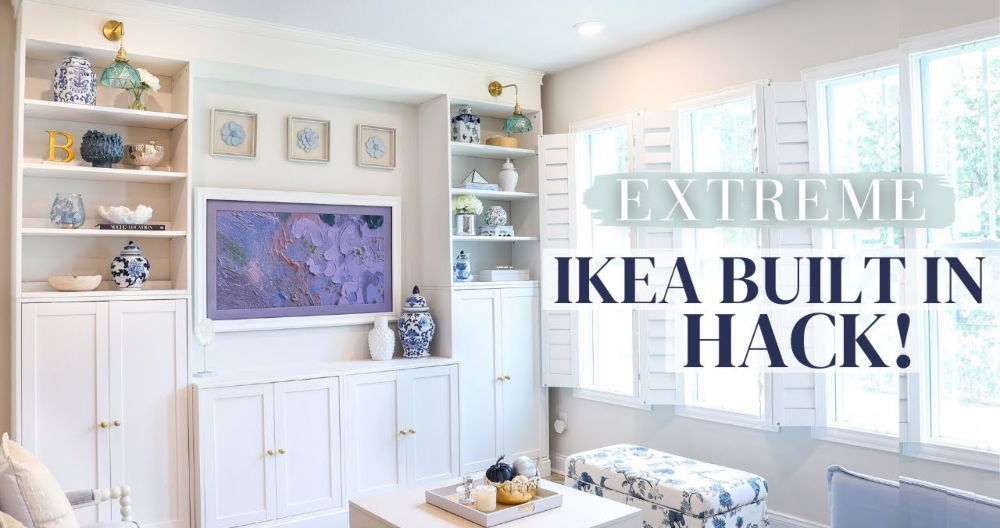
The secret to a convincing built-in lies in the art of illusion. IKEA’s sleek, modular designs are the perfect canvas for creating the illusion of permanence and craftsmanship. Start by selecting a cabinet style that mimics traditional built-ins, such as the IKEA Besta or Pax series, which offer clean lines and minimalist profiles. The key is to disguise the cabinetry’s origins by integrating it seamlessly into your walls.
Begin with a base cabinet, anchoring it to the wall studs for stability. Use a level to ensure precision, then add crown molding or trim at the top and bottom to create the illusion of a built-in frame. For a cohesive look, paint the cabinets and trim the same color as your walls, allowing the architecture to blend effortlessly into the space. The result? A built-in that whispers sophistication while shouting affordability.
Material Matters: Elevating IKEA Cabinets with High-End Finishes
While IKEA’s particleboard construction may not scream luxury, a few strategic upgrades can bridge the gap between budget and bespoke. Consider swapping out the standard hardware for matte black or brass pulls, which add a touch of elegance and mimic the hardware found in high-end custom cabinetry. For a more dramatic transformation, replace the cabinet doors with solid wood or glass panels, or opt for a two-tone look by painting the lower cabinets a bold hue while keeping the upper cabinets neutral.
Another game-changer is the addition of wood veneer or laminate to the cabinet faces. Thin wood veneer sheets can be applied with contact cement, instantly lending a rich, textured finish to your cabinets. For a modern twist, consider a high-gloss lacquer or a matte chalk paint, both of which reflect light beautifully and create a sense of depth. The goal is to make your IKEA cabinets feel like they were carved from solid oak or walnut, not assembled from a box.
Lighting the Way: Illuminating Your Built-In for Maximum Impact
Lighting is the unsung hero of interior design, and when it comes to built-ins, it can make or break the illusion of custom craftsmanship. Under-cabinet lighting, whether in the form of LED strips or puck lights, casts a warm glow that highlights the cabinetry’s details and creates a cozy ambiance. For a more dramatic effect, install recessed lighting above the built-in to draw the eye upward and emphasize the vertical lines of your design.
Consider adding a subtle backlighting effect by placing LED strips along the top or bottom of the cabinets. This technique not only enhances the depth of the space but also creates a soft, inviting glow that mimics the ambiance of a high-end boutique. For a touch of whimsy, incorporate smart lighting that can be adjusted to suit your mood, from warm, golden hues to cool, crisp whites. The right lighting can transform your IKEA hack from a functional storage solution into a statement piece.
Flooring and Trim: The Finishing Touches That Seal the Deal
No built-in is complete without the perfect flooring and trim to tie the design together. If your built-in spans the floor to ceiling, consider extending the flooring material to create a seamless transition. For hardwood floors, this might mean adding a matching wood plank or tile to the base of the cabinet. For carpeted spaces, a sleek baseboard or quarter-round trim can create a clean, finished look.
Trim work is another opportunity to elevate your design. Crown molding, baseboards, and paneling can be used to create a cohesive, high-end aesthetic. For a modern twist, opt for minimalist trim with clean lines, while a traditional space might benefit from ornate, detailed molding. The key is to ensure that the trim complements the existing architecture of your home, creating a harmonious flow between the built-in and its surroundings.

Functional Flair: Maximizing Storage and Style
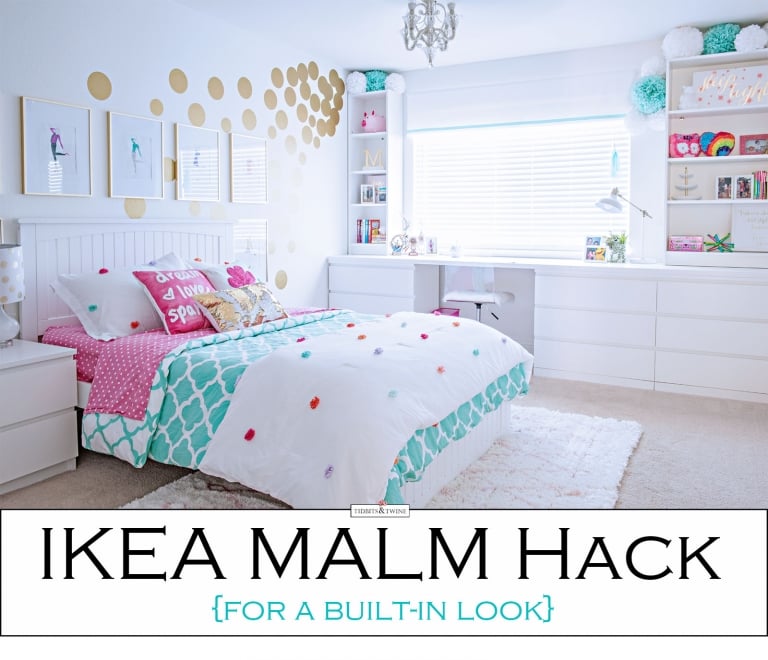
A built-in isn’t just about aesthetics—it’s also about functionality. IKEA’s modular systems allow for endless customization, so you can tailor your built-in to meet your specific needs. Add pull-out shelves, drawer organizers, or even a hidden appliance garage to keep your space clutter-free and efficient. For a home office or study, consider incorporating a drop-leaf desk or a built-in charging station to maximize productivity.
Don’t overlook the power of open shelving. By removing cabinet doors and adding floating shelves, you can create a display area for books, plants, or decorative objects. This not only adds visual interest but also makes your built-in feel more dynamic and personalized. The key is to strike a balance between form and function, ensuring that your built-in not only looks stunning but also serves a practical purpose.
Budget Breakdown: The Cost of a $5,000 Look for Pennies on the Dollar
One of the most compelling aspects of an IKEA built-in hack is the cost savings. While a custom built-in from a high-end designer can easily exceed $5,000, you can achieve a similar look for a fraction of the price. A basic IKEA cabinet starts at around $50, and with a few strategic upgrades—such as hardware, paint, and trim—you can transform it into a custom piece for under $200. Add in the cost of lighting, flooring, and labor (if you’re not DIYing), and you’re still looking at a total investment of under $1,000.
Of course, the exact cost will vary depending on the materials and finishes you choose. Solid wood doors, for example, will be more expensive than painted MDF, and high-end lighting fixtures can add up quickly. However, the beauty of an IKEA hack is that you can scale your project to fit your budget. Start with the basics and gradually upgrade as your funds allow, ensuring that your built-in evolves alongside your space.
The journey from flat-pack to fabulous is one of creativity, patience, and a willingness to see beyond the ordinary. With a little ingenuity, your IKEA cabinets can transcend their humble origins and become the crown jewel of your home. Whether you’re crafting a built-in library, a sleek media console, or a cozy window seat, the possibilities are endless. So roll up your sleeves, grab your paintbrush, and let the transformation begin. Your dream built-in is waiting—and it won’t cost you a fortune.


Leave a Comment